I’ve never written a blog post discussing things I’ve programmed and I thought it would be a good idea to try it out, I’ve heard that it brings good things. I don’t really know where to start with regards to discussing so I suppose I’ll talk about how I started designing Clockwork Constructors, but first a story…
This idea of Clockwork Constructors branched off of a desktop application I had made in C# called the (legacy) Plugin Constructor. I used Microsoft Visual Studio to make it, and that was actually the first time I had used the program.
If you’d like to take a look at the legacy Plugin Constructor program, you can download it here: http://clockwork.exiguousproductions.com/pluginconstructor/pluginconstructor-1.09.zip
Before I delve in to the details I’ll first show some pictures of what the legacy Plugin Constructor looks like.


So there it is. You enter data for where you want to output the plugin, the name of the plugin’s folder, the name of the plugin/author/description as it appears in-game, and then you select which files and folders to include. For those that don’t know, this is used to create a plugin for the Clockwork framework that’s written in Lua and used within the game called Garry’s Mod.
Now I can move on to the story of where the idea for Clockwork Constructors came from. One day I was sitting in a second semester lecture for college about Object Oriented Programming (OOP) and I decided to just start making an initial design. Before I even began the name “Clockwork Constructors” came to mind, it had a nice ring to it and borrowed from its predecessor; Plugin Constructor. Here’s what the initial design looked like:
That’s it, that’s all I had written in that fateful day in college. I had left it at that for a time and didn’t revisit the project until around March of 2017. At this time I started to get to work and made progress in bringing the web application to functionality. If you want to see where the website stands now, you can take a look at the live website here: www.ClockworkConstructors.com
When I started further work on the project I did some initial programming to get the flow of execution down. After I had done that I sat down to do some planning about how everything came together. I opened my Microsoft Visio program and started doing a sort of flow chart on how things would work. You can take a look at that in this PDF file:
User Execution Process For Item Construction
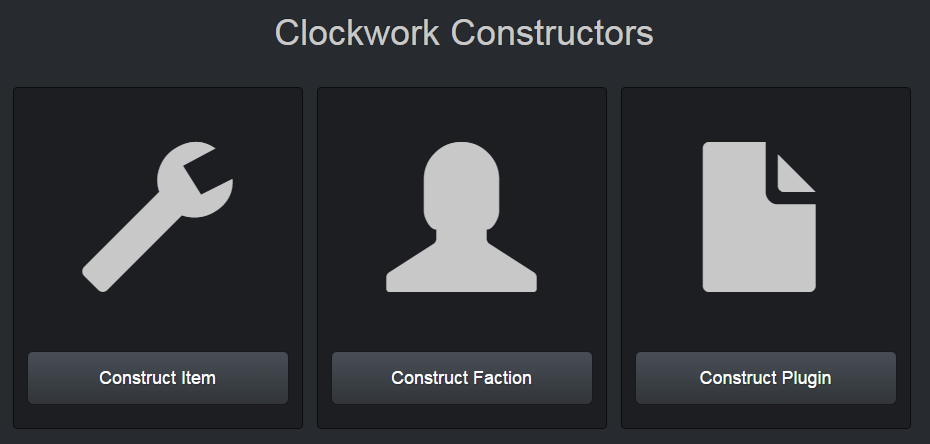
The first constructor I made was the Item Constructor. How it worked was that a user would enter various details about what the item would be such as the name, description, what it’s model would appear as in game, which base it would derive its functionality from, and much more. There’s still more to come for this constructor (e.g. base specific fields to customize), but at its current build it works just fine for most cases.
You can check out the Item Constructor here: https://clockworkconstructors.com/construct-item.php
At first the code for the Item Constructor was stuffed in to a single file alongside the rest of the code that did various things (I know, vague). This worked for just the Item Constructor, but if I wanted to move on to make more constructors it would be a hindrance. So what better thing to do than put my knowledge of Object Oriented Programming (OOP) to use? It fit perfectly with this website because I could have an object for each constructor and then a parent class to share functions that I would use between all other constructors (e.g. creating files, compressing them, displaying the download summary, etc.).
I worked on redesigning things so that the main execution for constructing (whatever it may be) would be much more readable when using OOP (Object Oriented Programming). I could’ve done this at the start of the project and it would’ve saved me the time, but I was focusing on getting a working model before moving on to more complex issues. Once I had completed that, things were starting to shape up and were looking pretty (in terms of the code).
Now I’ll move on to describing how this Item Constructor actually works in the background. The start of the process is pretty simple. The user enters data for the inputs, and then it’s passed along to where it can be processed. The system determines if any of data sent was tampered with, is invalid, or simply missing and will outright stop the execution if that’s the case. If everything checks out it determines which constructor to use and then creates the applicable object. The user’s data is applied to the object and then it proceeds with the construction. It’s fulfilling to see spaghetti code to now look like this:
1 2 3 4 5 6 7 8 9 10 11 12 13 14 | $itemConstructor = new Item(); $itemConstructor->base = $itemBase; $itemConstructor->name = $itemName; $itemConstructor->description = $itemDescription; $itemConstructor->model = $itemModel; $itemConstructor->category = $itemCategory; $itemConstructor->cost = $itemCost; $itemConstructor->weight = $itemWeight; $itemConstructor->batch = $itemBatch; $itemConstructor->consumable = $itemConsumable; $itemConstructor->droppable = $itemDroppable; $downloadURL = $itemConstructor->build($previousPage); |
There’s a few things to note about the code above. The build() function returns the URL to a downloadable .zip file in the $downloadURL variable. That .zip file contains whatever it is the user constructed. When executing the build() function the $previousPage variable is included. What this does is that if a user refreshes their download summary page, instead of reconstructing everything and serving a new download URL, it simply serves up what was already made. I’ll probably rework that to be defined in the parent class as a variable (so it would read as $itemConstructor->previousPage = $previousPage) and then separate the code that checks if the page was refreshed from the children classes to the parent class so that it’s cleaner.
Once all of that data has been sent to the Item object it proceeds to execute the build() function. The code first checks if it was a page refresh thus serving up the previous download URL, then it does one more check to see if the user did a construction in the past 10 seconds to avoid spam. If all checks out it proceeds with the construction. That creates the folder that the item will be constructed in, the actual item file, then it compresses the item file in to a .zip file and deletes the old item file since it’s no longer needed.
The actual file’s contents is created line by line and has the user’s inputs placed in the content where applicable. Once the content is ready, it creates the actual file and enters the contents. After all this is done the .zip is good go and is presented to the user for download in the download summary page, and voila! That’s how the Item Constructor works.
After the release of the Item Constructor I had done some more iterations of the website’s design and further improvements of the Item Constructor (as noted above). From there I moved on to making the Plugin Constructor. This works very similarly to the Item Constructor and the code to set that up looks like so:
1 2 3 4 5 6 7 8 9 10 | $pluginConstructor = new Plugin(); $pluginConstructor->name = $pluginName; $pluginConstructor->author = $pluginAuthor; $pluginConstructor->description = $pluginDescription; $pluginConstructor->version = $pluginVersion; $pluginConstructor->folders = $pluginFolders; $pluginConstructor->files = $pluginFiles; $downloadURL = $pluginConstructor->build($previousPage); |
The difference between the Item Constructor and Plugin Constructor is that the Plugin Constructor is now making various folders and more files/folders within folders. The Plugin Constructor was a bit more complex as now I was dealing with a file system instead of just a single file. As a result I had to remake my function that compressed a single file in to a .zip file so that it could instead compress multiple folders with files in them and keep the same structure. I also had to get fancy with my HTML so that I could send and thus handle an array of files/folders to be constructed.
You can check out the Plugin Constructor here: https://clockworkconstructors.com/construct-plugin.php
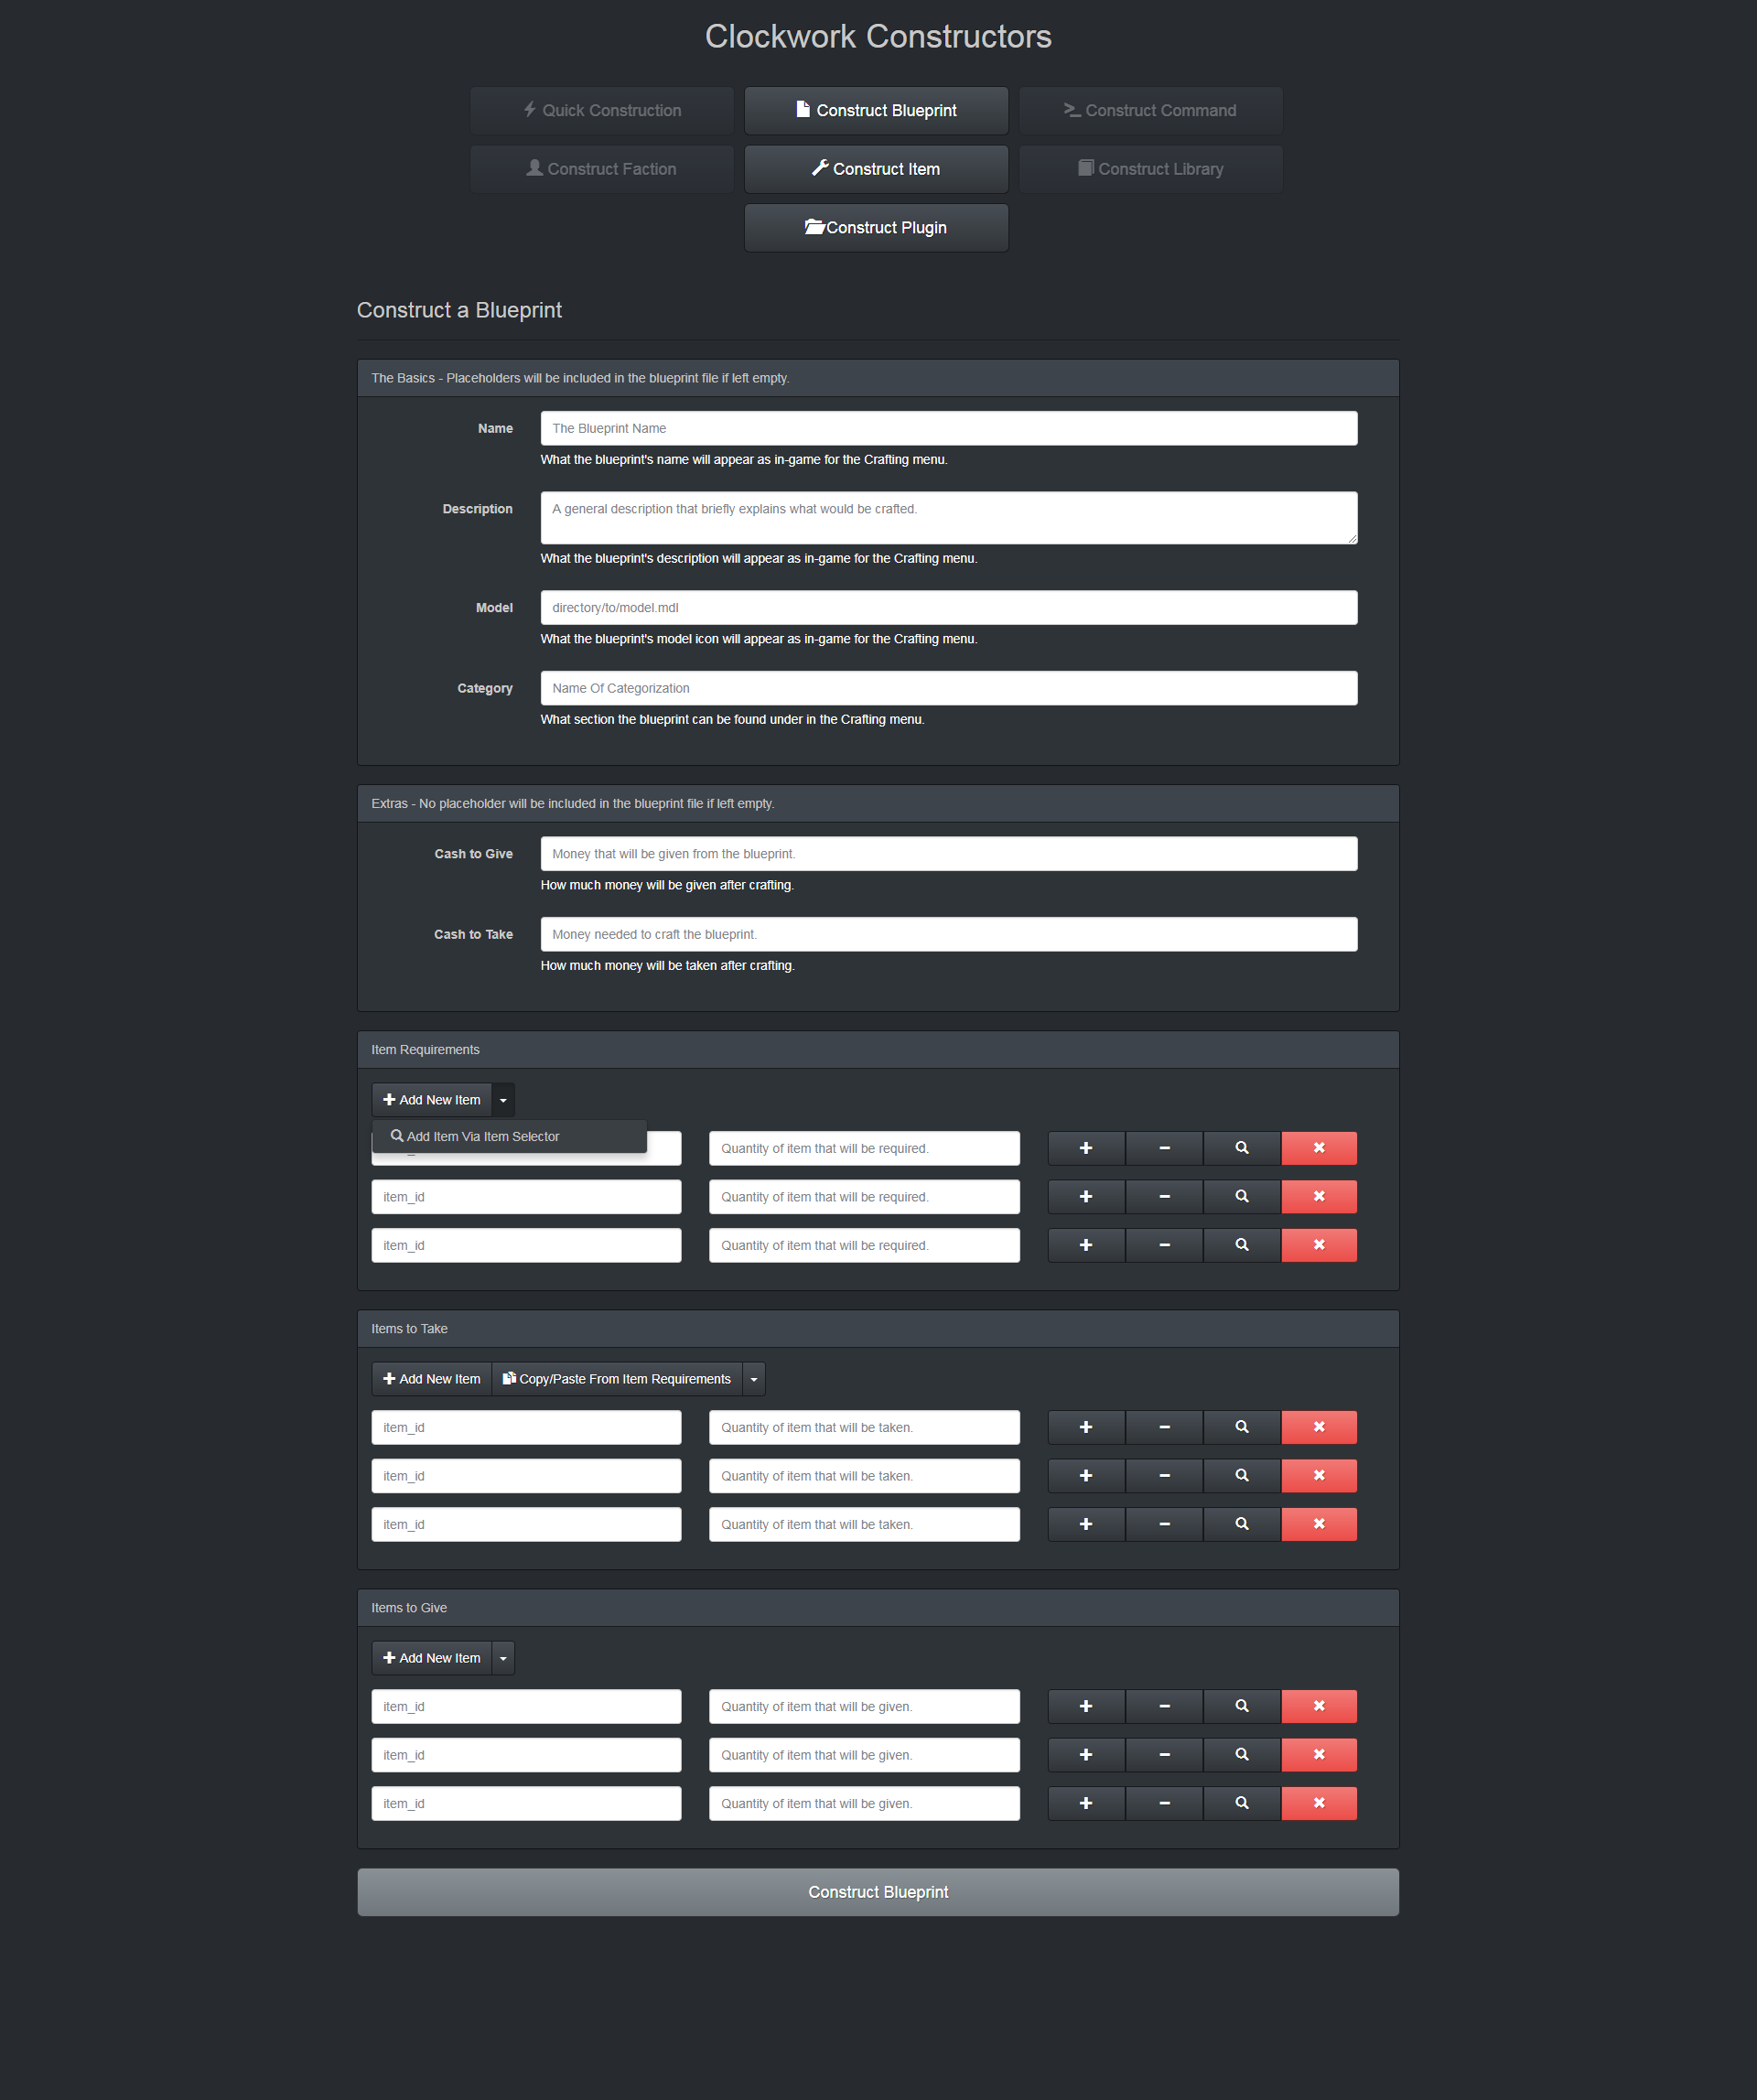
That’s all I’ll be talking about in this post, I’ll probably talk more about the Clockwork Constructors project once I do my next release which adds some more goodies and the Blueprint Constructor. Here’s some media on how things are looking:
[…] A First Analysis – Clockwork Constructors […]